
(WARNING! There are many pictures in this post, proceed with caution.)
Have any of you tried to make a hair clip with a crochet motif or a little flower? I've made them many times. It is easy to make a little flower. It is also easy to find snap clips. But for me personally it wasn't always easy to connect the two in a neat and pretty way, and at the same time to keep the hair clip from falling apart.
To tell you the truth, I've never searched internet to get ideas, I used to sew a piece of fabric to a snap clip, and then sew a flower onto that fabric. I've also tried to grue the flower onto the clip, but it always comes apart very soon. I came up with an idea of making tiny snap clip "hats". Only now that I'm writing this, I am wondering if someone somewhere invented something similar already.. Hm... Oh well... Maybe I've re-invented a bicycle, but at least I've taken a thousand of step-by-step pictures :) So here it goes:

 You will work in round starting from this chain. It means that at first you will work into loops marked with little red dots, then you will make your stitches on the other side of the chain, into the loops marked with yellow dots.
 Sc into 4 ch, starting from 2nd ch from hook.
 Continue working on the other side of the chain (loops marked with yellow dots)
 1 sc into the same st, sc in 3 next sts.


 Put on the hat (and when I say it, I mean put the hat onto the snap clip :) )
 Feed the ch 4 through the snap part of the hair clip (I have no idea what the correct anatomy terms for the snap clips are, but you know what I'm talking about).
 Make a slip stitch on the opposite side of the "hat", as pictured below.
 Turn the clip around and admire how neatly it looks. But wait. We are not done yet. We still have to make sure the hat stays on the clip forever.

 Next picture shows you the making of the stitch, that connects "hat" with the chain.

 Ch 4. Fasten off and leave a small tail, as pictured.
 Pull the yarn through the "hat". Cut off the excess thread.
 And it is complete! Making one "hat" takes me less than 10 minutes for sure. They always turn out very neat and hold this way forever! I hope you find this tutorial useful!
 Dahlia Flower (pattern here):
 Mini rose flower (pattern here):
 Or here's a cute little flower (free pattern below):

Ch 3.
 12 dc into the 1st ch. Join with sl st.
 Ch 2, 2 dc in 1st dc, 2 dc in next dc, ch 2, sl st into the same st as last dc. First petal is complete.
 [Sl st into next st, ch 2, 2 dc in same st as sl st, 2 dc in next dc, ch 2, sl st into the same st as last dc.] 5 times. The flower now has 3 petals. Fasten off.
 You can leave the flower as is, and sew it on the hair clip (of use it for any other project):
 Or make a tiny flower to add 3D effect to the flower.
 [Ch 2, dc into the 1st ch of the flower, ch 2, sl st into the 1st ch of the flower.] 4 times. 5 petals in total. (All the petals connect into the very first chain of the flower.)

 Fasten off and leave a long end for sewing. Connect the two flowers together, and sew onto the hair clip "hat" :)
 Enjoy!!
How to decorate boring hair snap clips.

You'll need crochet thread #10, crochet hook US #7 (1.50 mm). Snap clip (2" long and just under 0.5 inches at its widest point).
How to read this pattern: First goes the explanation, then the picture right below the words it refers to. Very simple :)
Ch 5.
 You will work in round starting from this chain. It means that at first you will work into loops marked with little red dots, then you will make your stitches on the other side of the chain, into the loops marked with yellow dots.
 Sc into 4 ch, starting from 2nd ch from hook.
 Continue working on the other side of the chain (loops marked with yellow dots)
 1 sc into the same st, sc in 3 next sts.
You've finished round 1.
Continue working in rounds and make 24 sc around (=3 more rounds of sc). This is what the "hat" will look like:

Turn is right side out. (use the dull side of your hook to help you turn this tiny thing right side out.


And now you have a tiny hat that will fit the hair clip perfectly.
Ch 4.
 Put on the hat (and when I say it, I mean put the hat onto the snap clip :) )
 Feed the ch 4 through the snap part of the hair clip (I have no idea what the correct anatomy terms for the snap clips are, but you know what I'm talking about).
 Make a slip stitch on the opposite side of the "hat", as pictured below.
 Turn the clip around and admire how neatly it looks. But wait. We are not done yet. We still have to make sure the hat stays on the clip forever.
Oh and on a picture below those are not the eyes and a red nose. This is my way of showing you where fext stitches will go. Make a sc into the st marked with yellow dot. For the next st, insert your hook into the st marked with red line AND through the chain, finish the sc. Next make a sc into the st marked with green dot.
 Next picture shows you the making of the stitch, that connects "hat" with the chain.
Make a slip stitch into the next st. And this is what the other side of the hair clip looks like at this moment. At this point there is no way to take off the hat, it is connected with the hair clip very securely.
 Ch 4. Fasten off and leave a small tail, as pictured.
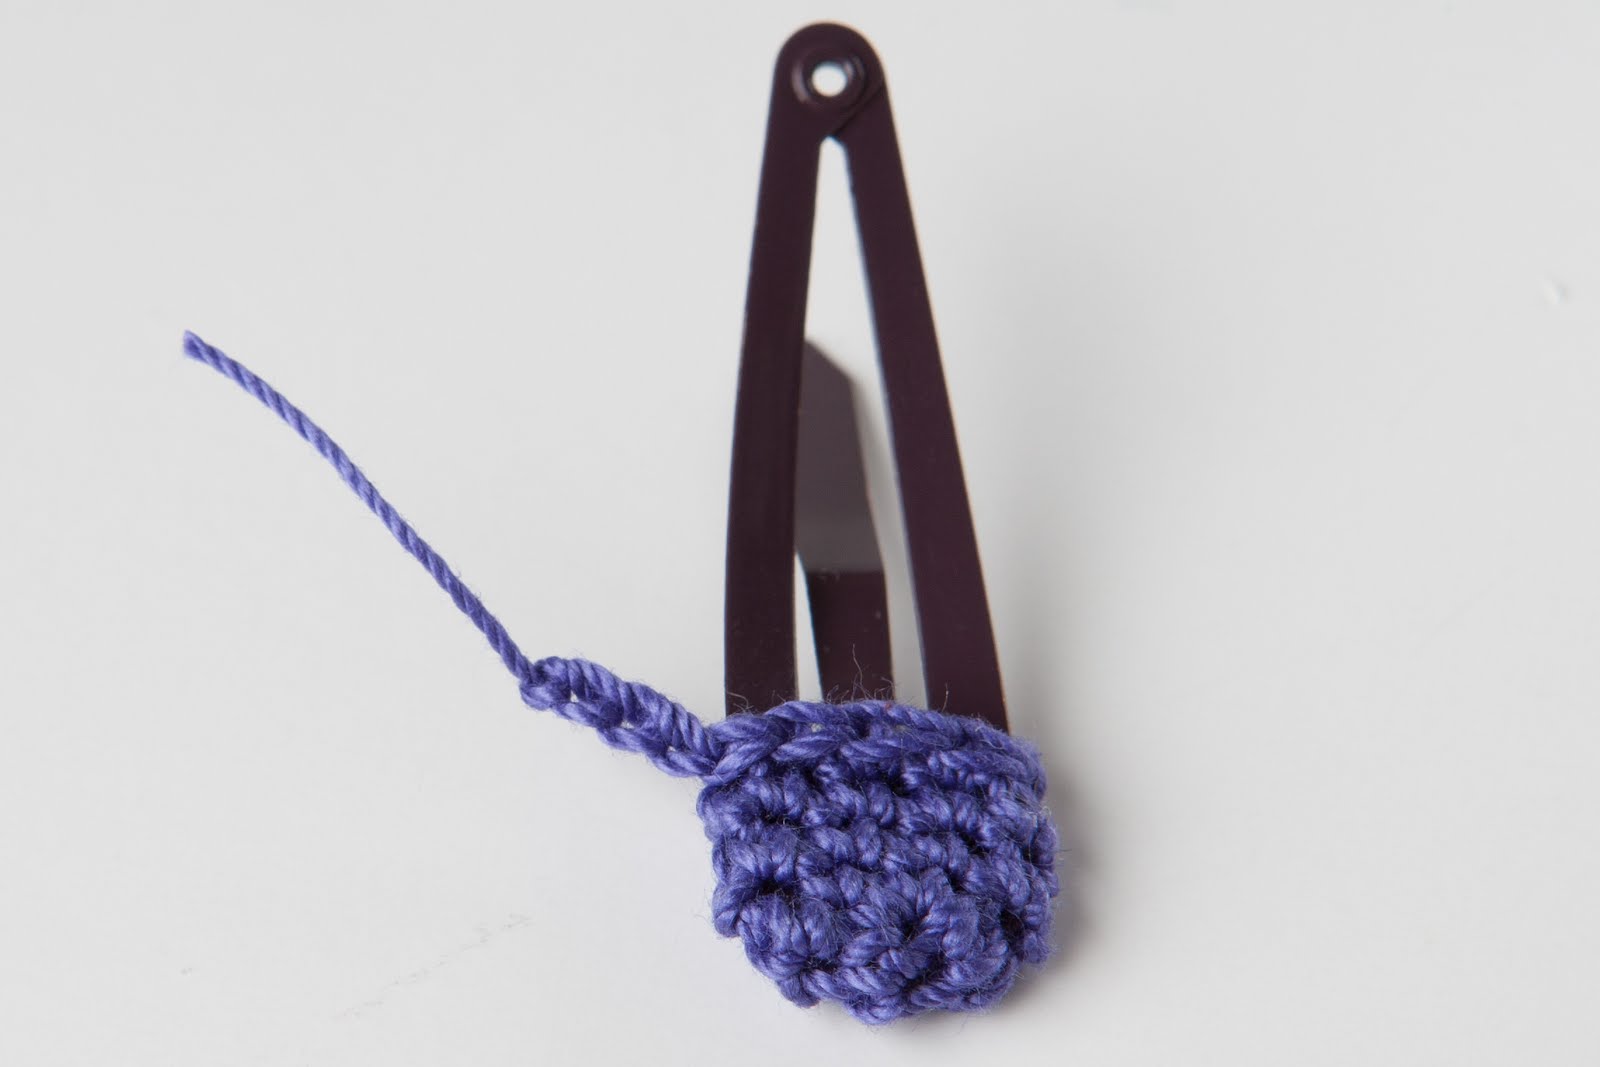 Pull the yarn through the "hat". Cut off the excess thread.
 And it is complete! Making one "hat" takes me less than 10 minutes for sure. They always turn out very neat and hold this way forever! I hope you find this tutorial useful!
Sew on your favorite flower.
I've got a few flowers just the perfect size for the hair clip:
Hibiscus Flower (pattern here):
 Dahlia Flower (pattern here):
 Mini rose flower (pattern here):
 Or here's a cute little flower (free pattern below):
 12 dc into the 1st ch. Join with sl st.
 Ch 2, 2 dc in 1st dc, 2 dc in next dc, ch 2, sl st into the same st as last dc. First petal is complete.
 [Sl st into next st, ch 2, 2 dc in same st as sl st, 2 dc in next dc, ch 2, sl st into the same st as last dc.] 5 times. The flower now has 3 petals. Fasten off.
 You can leave the flower as is, and sew it on the hair clip (of use it for any other project):
 Or make a tiny flower to add 3D effect to the flower.
Ch 3, dc in 1st ch, ch 2, sl st into 1st ch.
 [Ch 2, dc into the 1st ch of the flower, ch 2, sl st into the 1st ch of the flower.] 4 times. 5 petals in total. (All the petals connect into the very first chain of the flower.)
 Fasten off and leave a long end for sewing. Connect the two flowers together, and sew onto the hair clip "hat" :)
  Enjoy!!
these are cute!!! my dd always wears these clips so its nice to have a pattern to dress them up! thanks for the lovely pattern!
ReplyDeleteYarn_lady, you are very welcome! I am glad someone (besides me) finds this little pattern useful! :)
ReplyDeleteperfect!! it's a great idea!!
ReplyDeleteat least I had never thought of something similar ... and was always thinking "how do I not end up separating? ..." Now I know :D.... thank you very much for sharing!!!
Wow! These are very pretty for girls and teens. I love them. I love how you laid out all the instructions. I have 2 little girls and I will use this to make them some. This is wonderful to use up all that scrap yarn we always have and don't know what to use it for.
ReplyDeleteThank you for sharing this great pattern and idea.
Great idea! Thank you so much for sharing!
ReplyDeleteThank you for the lovely tutorial! Perfect gift for my friend's birthday! She's obsessed with her hair ;)
ReplyDeleteThese are wonderful! I will have to make them for my friends daughter.
ReplyDeleteThank you for sharing, ♥ =-)
ReplyDeleteThese are WONDERFUL! I am looking for gifts for my daughter-in-law's baby shower, and these are AMAZING! Your kinda brilliant, TY!
ReplyDeleteThank you for all this! Just perfect.
ReplyDeleteI love your clips, and your instructions are great!
ReplyDeleteThank you . . . my granddaughters will have some fun clips soon :)
how do you attach the flower to the "hat"?
ReplyDeleteLovely lovely clips! Very much liked the way you have attached the flower to the clip.
ReplyDeleteLove the clips :D thanks for the ideas they were a great help
ReplyDeleteThank you so much for sharing this tutorial. This is just the One I was looking for and now finally found it here! Talitha
ReplyDeleteOh. My. Goodness. Thank you so much for this. I was beginning to go absolutely bonkers trying to figure this out. I can't use glue...I was getting desperate. Yay! Thanks again!
ReplyDeletethanks for the wonderful tutorial! It's so much better than just sewing the flowers on, which I've been doing! I'm going to try it right now!!
ReplyDeleteLovely clips. thanks for the tutorial. I have also made a set like this. I will give the link once I blog about it.
ReplyDeletewww.shamiatcraft.blogspot.com
Great!!! Thank you!!!!!!!
ReplyDeleteYou are a genuis. Begone, nasty glue guns!!
ReplyDeleteGorgeous :)
ReplyDeleteYou are a god send!! I also have been trying to work out the best way to achieve this!! Thank you so much (^.^)
ReplyDeleteThank you for these great patterns !!!! I shared your post on google+ and I also pinned this project. Thank you !!!
ReplyDeleteMarisa from http://passionetcouture.blogspot.ca/
Thank you for this - I must be a bit slow!! Been crochet-ing ALL around the clip and it's hard going (did it for adding beads) this is SO much better. Big Thankyou :)
ReplyDelete